Sales Order
You can process Sales Order either in Auto Conversion mode or Manual mode.
a) Auto Conversion Mode
Follow the following steps:-
Step 1 Launch Sales Quotation module.
Step 2 Select either customer or quotation number from the pull down. Be reminded that the status of the quotation must be confirmed

( Fig 1 )
Step 3 Click the “Convert To” button and select “Sales Order”. System will automatically copy common data from Sales Quotation to Sales Order. You will see this after the conversion (Fig.1)
Step 4 You can proceed to amend, edit the Sales Order. (Fig. 2)
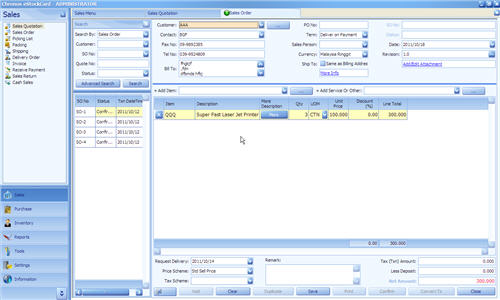
( Fig 2 )
b) Manual Mode
Please click “Sales Order” at Sales Module right away and you will see this with blank content. (Fig. 3)
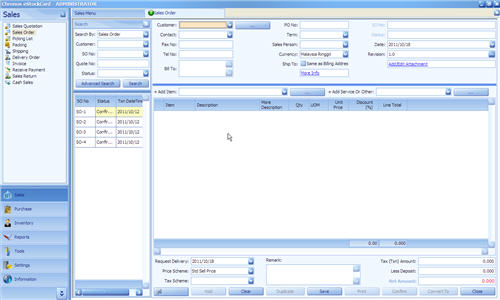
( Fig 3 )
Follow the following steps to enter data:-
Step 1 Click “Customer” and the pull down menu will display all the customer lists, please choose one customer only. System will automatically retrieve predefined information for the selected customer (Contact, Fax No, Tel No, Billing Address, Term and Currency). This will greatly reduce huge amount of clerical works.
Step 2 You can opt to enter additional information such as “Customer PO No” and “Sales Person”, if it is applicable. This is an optional field.
Step 3 If the procurement officer wishes to amend the shipping address, please click “more info” to enter new address. Otherwise, system will duplicate the Billing Address when you tick “Same as Company”.
Step 4 You can retrieve “Sales Quotation” information if they are available by click “Search By” and then select the appropriate Quotation number. System will retrieve all the common information and replicate it to the relevant fields (Fig. 4)
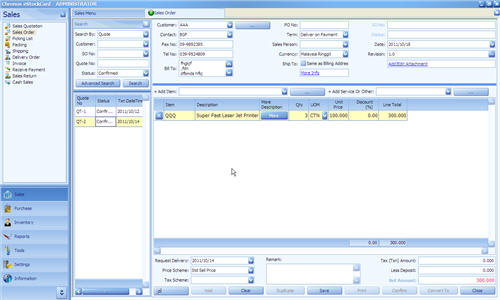
( Fig 4 )
Step 5 Otherwise, you can manually insert item by item from the pull down menu “+ Add Item”, system will automatically retrieve default value such as UOM, Unit Price (amendable). User is required to enter “Qty”. Additional trade terms such as “Discount” and “Tax Scheme” can be entered if they are applicable. The “Tax Scheme” for each line is known as local (it means it will only apply to that specific line only) and “Tax Scheme” must be predefined at Settings > Tax Scheme.
Step 6 Select date of delivery by click “Request Delivery”.
Step 7 Select “Price Scheme”. This is a global setting and applies to all entries. “. “Price Scheme” must be configured at Settings > Item > Selling Price.
Step 8 If all the items are subjected to the same tax structure (same type, same quantum), then user can opt to enter global “Tax Scheme”.
Step 9 Click “Save” and new Sales Order number to be generated and the status of the Sales Order have been set as “Active”.
User can perform editing, for instances, add new items, modification of quantity, terms and conditions. Please press “Save” button before you quit from the system. (Fig. 5)
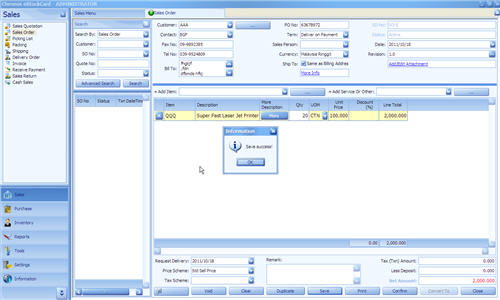
( Fig 5 )
Step 10 Click “Confirm” if there is NO more modification and amendment. This is crucial before you can proceed to the next stages such as Picking List, Delivery Order or Invoice. (Fig. 6)

( Fig 6 )
Step 11 Sales personnel can then print it by clicking “Print” button for further action. (Fig. 7)
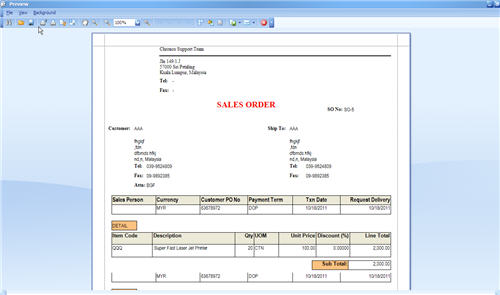
( Fig 7 )