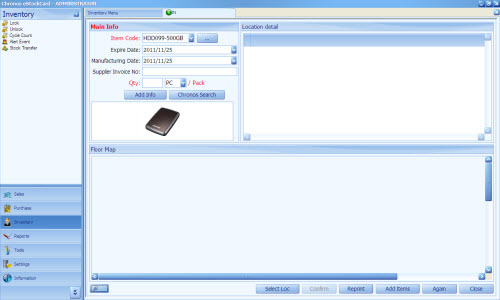
Item image can be adding into the eStockCard inventory software so when users perform the IN (storing) transaction, they are able to identify whether the stock received is the correct one. However, this is only applicable to the IN / OUT screen for the eStockCard v3 Warehouse & v3 Premier Edition.
The steps to add the item images are as following:-
Step 1 Go to ‘Settings > Item > Master’ on Settings and select the item that you want to add the image and click on the modify button (Fig 1).

( Fig 1 )
Step 2 At the top right box, right click and select “Load” to add the item image (Fig 2 ).

( Fig 2 )
Step 3 Browse the item image on your pc ( Fig 3 ).

( Fig 3 )
Step 4 The Item image should appear as shown (Fig 4 ). Save it.

( Fig 4 )
Preview Item Image From IN Screen. ( For Premier edition and Warehouse Edition)
To view the item image at the IN screen, please customize it as follows:-
Step 1 Go To ‘Inventory -> IN’ on the eStockCard.
Step 2 Click customize button and drag ‘ Item Picture’ into the screen ( Fig 5 ).

( Fig 5 )
Step 3 When selecting the item code at the IN screen , the item image shall appear (Fig 6 ).

( Fig 6 )
Related posts:
- Adding Item image in the eStockCard Warehouse System
- Switch between the 2 editions (v3 Warehouse and v3 Premier) from the eStockCard Free Inventory Software
- Editions are available for Chronos eStockCard Inventory Software
- Connect Multiple Computers with eStockCard Inventory Software Installed via LAN
- Start the eStockCard inventory software with a fresh Database