Here are the steps to setup Chronos eStockCard Server (database) on your own SQL Server 2005:-
To setup a new Instance Engine, run the SQL 2005 Setup, it will install another instance engine name use for Chronos eStockCard Inventory System Only.
EXAMPLE: We assume that you are using Standard Edition of SQL Server 2005, it is quite similar to any production SQL Server 2005 Edition.
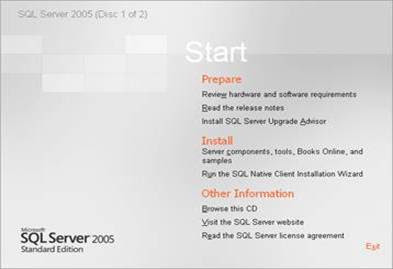
a) Start the new instance installation by clicking the “Server Components, tools, book online and Sample Heading under “install header”.
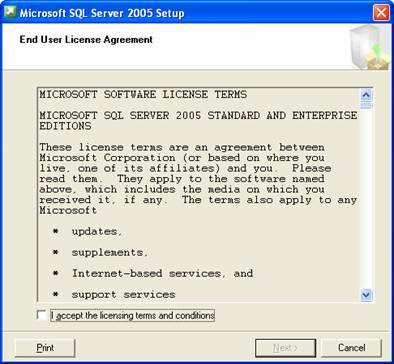
b) Tick the checkbox to accept the agreement and click “Next” button.
c) Click “Next” to start the installation.
d) System Configuration Check – The installation application will review 15 components on the server and determine success or fail. If ok, please review the report. If no error, then click “Next” to start the configuration screen.
e) Installation – A progress bar will indicate the status of the installation. No action needed.
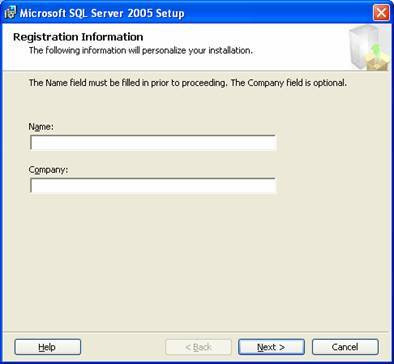
f) Enter the registration info. If you have installed it before, this information is automatically pulled from previous settings.
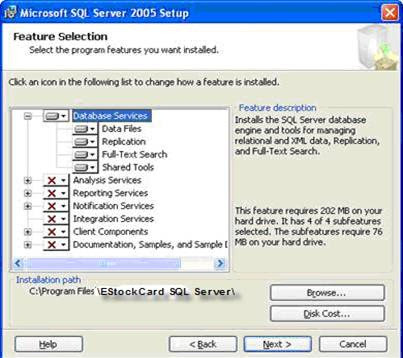
g) Tick “SQL Server Database Services” and click “Next” button.
h) Change the Installation Path to C:\Program Files\EStockCard3 SQL Server\ then click “Next” button.
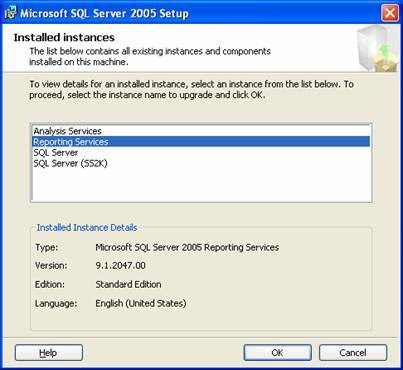
Installed Instances – If applicable, existing instances will be listed with the application, version, edition and language. Click the “OK” button to proceed.
i) Under Named Instance, Type “ESTOCKCARD3” and click “Next” button.
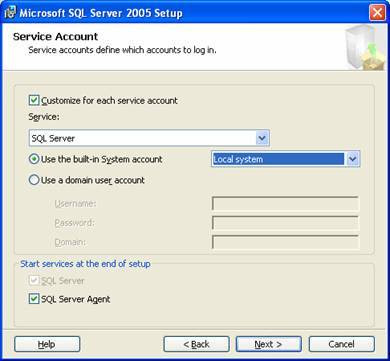
j) Service Account – Specify the service account for the Database Services Windows Service. This could be a built-in account such as Local System or Network Service. The second option is to use a domain user name and password. Choose “Network Service” from the drop down list. Click “Next” button to proceed.
k) At this step, we suggest that you use “Mixed Mode” because it is easier to setup for network environment. Enter your desired sa password, please remember that you can enter different password and this password is only for your production server but not for Chronos eStockCard System since you will create another DBO user for this system.
l) For Collation setting, just use the default settings. Click “Next” and start the installation.
m) View the setup summary and click “Next” to start the installation. Once it is done, you will notice you have another instance name “ESTOCKCARD3” is running. This would be the Instance using by Chronos eStockCard.
(Please remember, if you need a network access to ESTOCKCARD3 SQL Server Engine, you will need to enable the TCP/IP, Named Piped for the network interface. If you not sure about this, you can use the “SetFirewall.Bat” file to enable the settings).
n) Once completed, please go to the eStockCard Installation file and then go to the folder \Chronos_e-StockCard_v3.1.x\Files\Service
o) Click on the Setup.exe file to auto installed the eStockCard Services into the server PC.
To Reattach the Database
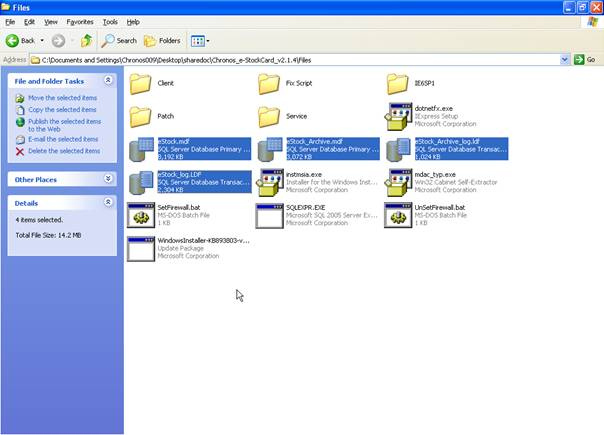
1. Locate the 4 database files under Chronos eStockCard Folder_v3.1.x\Files\. The 4 files are:- eSock.mdf. eStock_Archive.mdf, eStock_Archive_log.ldf and eStock_log.LDF. Please refer image below.
2. Copy and paste this file into new EStockCard Data Folder, should be C:\Program Files\EStockCard3 SQL Server\MSSQL.1\MSSQL\Data Folder.
3. Then use Microsoft SQL Server Management Studio Express or equivalent tools to reattach the database, you need to reattach two database, eStock and eStock_Archive. Run your Microsoft SQL Server Management Studio Express and at “Connect to Server” screen, choose your MachineName\ESTOCKCARD3 and login. You should have no database at this point, only Master and few database.
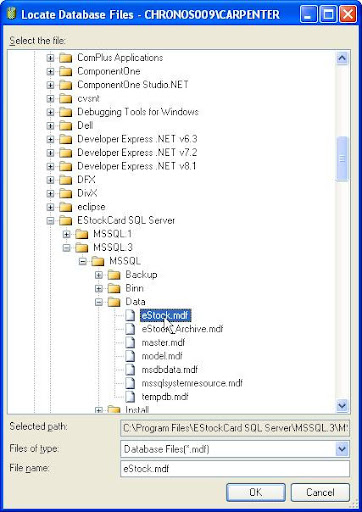
4. Right click the database header and choose “attach” menu, click “Add” button to select the eStock.mdf file (refer my sample below), then click “OK” button.
5. Repeat the same steps for eStock_Archive, remember to create the DBO user and assign the DBO user can access eStock and eStock_Archive Database and the Master Database as well.
For changing connection during login
- Run the Chronos eStockCard Program, default system will look for ESTOCKCARD3 instance. Since you are not using the “SA” password that we supplied, you will see the Error Connecting Dialog when you come to Login Screen and this is a normal case.
- Click the “Server Connection” button and change the Server Connection Configuration.
- Click the “Connect” button. If the connection is established, the Connection Dialog will close by itself.
- Finally, you can login to Chronos eStockCard Inventory System now.
Related posts:
- Why I were unable to receive email alert in the eStockCard Tracking System?
- How many items can be supported by Chronos eStockCard Inventory Software?
- User ID and password for sample database in eStockCard Inventory Software
- Backup Database Manually in the eStockCard Inventory System
- Steps to activate Chronos eStockCard v3 (Warehouse, Premier) — Offline Method
